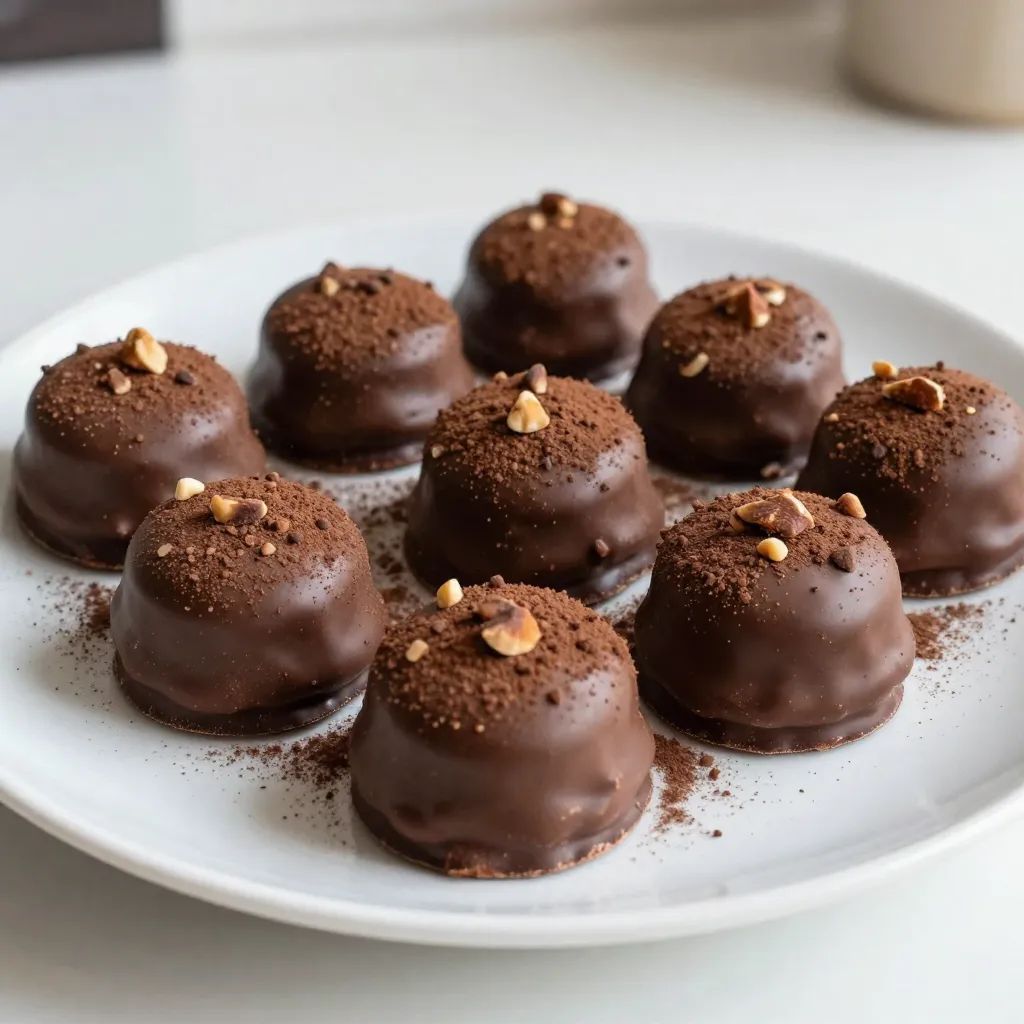
Are you ready to indulge in a sweet treat that’s both simple and delicious? Chocolate covered cheesecake bites are the perfect mix of creamy cheesecake and rich chocolate. With just a few ingredients and easy steps, you’ll create a dessert that wows friends and family. Join me as I guide you through this tasty adventure, filled with tips, variations, and all the secrets to a perfect bite!
Why I Love This Recipe
- Simple and Quick: This recipe is incredibly easy to follow and can be prepared in just 10 minutes, making it perfect for last-minute cravings or gatherings.
- Decadent Flavor: The combination of rich cream cheese and chocolate creates an indulgent treat that satisfies any sweet tooth.
- Customizable Toppings: With options like cocoa powder, nuts, and sprinkles, you can personalize each bite to suit your taste or occasion.
- Perfect for Sharing: These bites are ideal for parties and gatherings, allowing guests to enjoy a delightful dessert in a convenient, bite-sized form.
Ingredients
Essential Ingredients for Chocolate Covered Cheesecake Bites
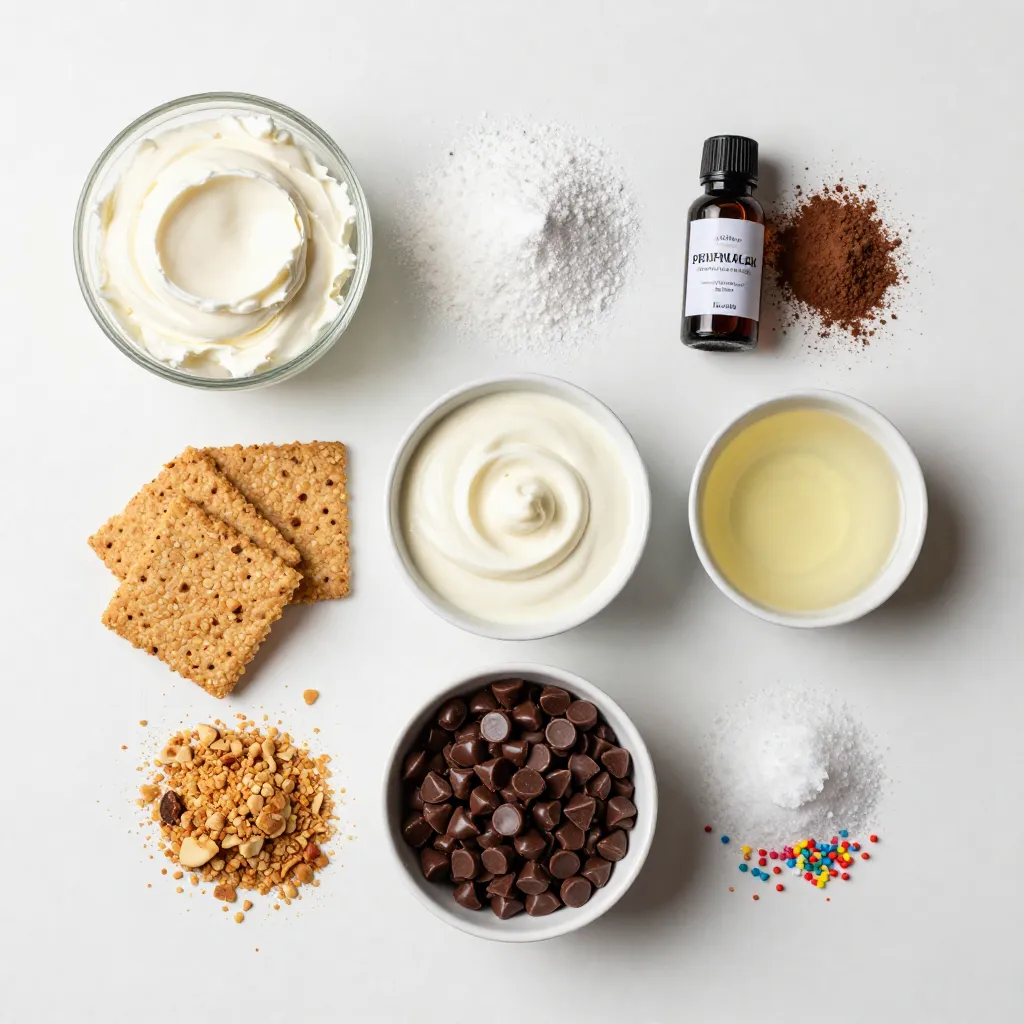
To make these tasty bites, you need a few key items:
- 1 cup cream cheese, softened to room temperature
- ½ cup powdered sugar
- 1 teaspoon pure vanilla extract
- ¼ cup sour cream
- ½ cup finely crushed graham crackers
- ½ cup semisweet chocolate chips
- 1 tablespoon coconut oil
- Pinch of salt
These ingredients create a creamy filling that pairs perfectly with chocolate. The cream cheese gives richness. The powdered sugar adds sweetness, and the sour cream brings a slight tang.
Optional Toppings to Enhance Flavor and Presentation
You can make your cheesecake bites even more fun with toppings. Here are some ideas:
- Cocoa powder
- Chopped nuts
- Colorful sprinkles
These toppings not only add flavor but also make your bites look amazing. You can mix and match to find your favorite combo.
Common Substitutes for Ingredients
If you don’t have an ingredient, here are some easy swaps:
- Cream cheese: Use mascarpone for a lighter texture.
- Powdered sugar: Granulated sugar can work if you blend it well.
- Sour cream: Greek yogurt is a great alternative.
- Semisweet chocolate: Dark chocolate adds a deeper flavor.
These substitutes help you stay flexible in the kitchen. Feel free to explore and adjust based on what you have.
Step-by-Step Instructions
Preparation of the Cheesecake Mixture
Start by taking a medium mixing bowl. Add 1 cup of softened cream cheese. Next, mix in ½ cup of powdered sugar. Then, add 1 teaspoon of pure vanilla extract and ¼ cup of sour cream. Use an electric mixer to beat everything on medium speed. Keep mixing until the mixture is smooth and creamy. Make sure there are no lumps left. This step gives the cheesecake its rich texture.
Once it’s creamy, fold in ½ cup of finely crushed graham crackers with a spatula. This adds flavor and texture. Be gentle so you don’t lose the air you just whipped in. The mixture should be thick but spreadable.
How to Form Perfectly Sized Bites
Now it’s time to shape the cheesecake mixture. Use a small cookie scoop or a spoon. Take about a tablespoon of the mixture and roll it into a ball. Aim for about 1 inch in size. This keeps each bite uniform and easy to eat.
Place the rolled balls on a baking sheet lined with parchment paper. This stops them from sticking. Once the tray is full, put it in the freezer. Let the bites chill for at least 30 minutes. They should feel firm when you touch them. This step helps the coating stick better later.
Melting Chocolate and Coating Tips
For the chocolate coating, grab a microwave-safe bowl. Add ½ cup of semisweet chocolate chips and 1 tablespoon of coconut oil. The oil helps the chocolate melt smoothly. Microwave the bowl on medium power in 20-second bursts. Stir well after each burst until the chocolate is fully melted and smooth.
Now, take the frozen cheesecake balls out of the freezer. Using a fork, dip each ball into the melted chocolate. Make sure to coat each ball fully. Let any extra chocolate drip off before placing them back on the parchment paper.
While the chocolate is still wet, sprinkle your favorite toppings. You can use cocoa powder, chopped nuts, or colorful sprinkles. These add fun flavors and make your bites look great. Finally, put the tray back in the fridge for at least 15 minutes. This helps the chocolate set. Enjoy your tasty treats!
Tips & Tricks
Achieving the Right Consistency for the Cheesecake Filling
To make a smooth filling, use room temperature cream cheese. Cold cream cheese lumps up and makes mixing hard. Beat the cream cheese with powdered sugar and vanilla until creamy. Add sour cream for a rich taste. Fold in crushed graham crackers gently. This keeps the mixture light and fluffy. Aim for a thick, yet spreadable, consistency.
Best Practices for Melting Chocolate
Use a microwave-safe bowl for melting chocolate. Mix in coconut oil to keep it smooth. Heat chocolate in 20-second bursts, stirring after each. This helps avoid burning. If you see lumps, keep stirring; they will melt away. The chocolate should be shiny and fluid when ready. Don’t rush this step; take your time for the best results!
Presentation Tips for Serving
A great presentation makes any dessert shine. Use a nice platter to display your cheesecake bites. Dust cocoa powder or drizzle melted chocolate on top for flair. You can also sprinkle chopped nuts or colorful sprinkles for a fun touch. Keep the bites chilled until serving. This maintains the chocolate’s shine and keeps the cheesecake firm. Enjoy the smiles when you serve these tasty treats!
Pro Tips
- Chill for Better Coating: Ensure your cheesecake balls are completely frozen before dipping them in chocolate. This helps the chocolate to set quickly and provides a smooth, even coating.
- Choose Quality Chocolate: Use high-quality chocolate for melting to enhance the flavor of your cheesecake bites. Dark chocolate can also be a delicious alternative to semisweet chocolate.
- Experiment with Flavors: Feel free to add different flavor extracts, such as almond or orange, into the cheesecake mixture for a unique twist on the classic flavor.
- Customize Toppings: Get creative with your toppings! Try crushed pretzels, coconut flakes, or even edible glitter for a festive touch that will elevate your cheesecake bites.
Variations
Flavor Variations for Cheesecake Bites
You can change the flavor of your cheesecake bites easily. Here are some fun ideas:
- Chocolate Mint: Add a few drops of mint extract to the cream cheese mix.
- Lemon Zest: Mix in some lemon zest for a refreshing twist.
- Berry Bliss: Blend in some berry puree for fruity goodness.
- Coffee Lovers: Stir in espresso powder for a rich, coffee flavor.
These flavors keep things interesting. Each bite can surprise your taste buds!
Alternative Coatings and Toppings
While semisweet chocolate is great, you have many options. Here are some ideas:
- White Chocolate: This adds a sweet and creamy layer.
- Dark Chocolate: For a richer taste, dark chocolate works well.
- Yogurt Coating: Use melted yogurt chips for a tangy touch.
For toppings, try these:
- Chopped Nuts: Add crunch with almonds, walnuts, or pecans.
- Cocoa Powder: A sprinkle gives a nice chocolate boost.
- Sprinkles: Use colorful sprinkles for a fun look.
Mix and match coatings and toppings for your perfect bite!
Making a Healthier Version
Want a lighter treat? You can easily make your cheesecake bites healthier. Here’s how:
- Use Greek Yogurt: Swap cream cheese with Greek yogurt for less fat.
- Natural Sweeteners: Use honey or maple syrup instead of powdered sugar.
- Whole Grain Crackers: Choose whole-grain graham crackers for better fiber.
These changes keep the flavor but reduce calories. Enjoy your tasty treats guilt-free!
Storage Info
How to Store Chocolate Covered Cheesecake Bites
To keep your chocolate covered cheesecake bites fresh, store them in an airtight container. Place a layer of parchment paper between layers to avoid sticking. This keeps them safe and tasty. You can store them in the fridge or freezer, depending on how soon you plan to eat them.
Freezing vs. Refrigerating
Refrigerating your cheesecake bites is great for short-term storage. They will stay fresh for about a week. If you want to keep them longer, freezing is the way to go. When frozen, they can last up to three months! Just make sure to wrap them well to avoid freezer burn.
Shelf Life and Best Practices
The shelf life of chocolate covered cheesecake bites depends on how you store them. In the fridge, they last about 5 to 7 days. In the freezer, they can last up to three months. For best results, always use fresh ingredients. Avoid leaving them out for too long, as the chocolate can melt or become sticky.
FAQs
How do I make cheesecake bites without graham crackers?
You can make cheesecake bites without graham crackers by using nuts or oats. Try finely ground almonds or walnuts for a nutty base. Alternatively, you can use crushed cookies like Oreos for a different flavor. Just mix these alternative ingredients into the cream cheese filling as you would with graham crackers. This keeps the bites creamy and delicious while changing the taste and texture.
Can I use milk chocolate instead of semisweet?
Yes, you can use milk chocolate instead of semisweet chocolate. Milk chocolate will give your bites a sweeter taste and a creamier texture. However, be aware that the flavor of the cheesecake might be less rich. If you prefer a sweeter treat, milk chocolate is a great choice. Just melt it the same way as semisweet chocolate, and dip your cheesecake bites.
How long do chocolate covered cheesecake bites last in the fridge?
Chocolate-covered cheesecake bites can last about one week in the fridge. Make sure to store them in an airtight container to keep them fresh. If you want them to last longer, consider freezing them. They can stay good for up to three months in the freezer. Just thaw them in the fridge before serving for the best taste and texture.
You learned how to make delicious chocolate covered cheesecake bites. We covered essential ingredients, simple steps, and helpful tips. I shared flavor variations and storage advice too. By following this guide, you can create tasty treats for any occasion. Enjoy personalizing your bites with fun toppings. Whether you want a classic or a healthier version, these bites will impress everyone. Now, get started and make your own delightful creation